
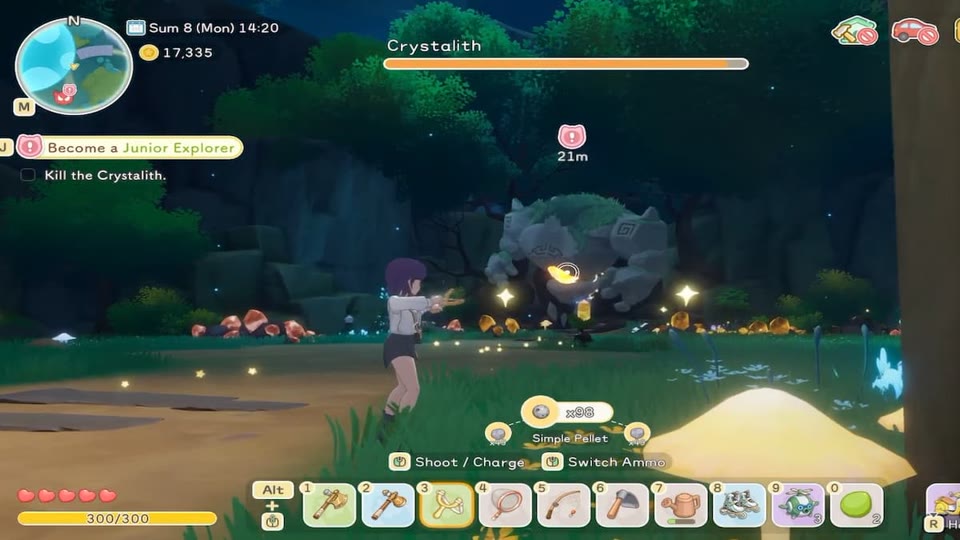

Start the fight fresh, carry health and stamina food, bring more than one ammunition type, and keep a fixed recovery reserve that is never spent on the approach.
Boss attempts fail for predictable reasons: insufficient damage, no healing reserve, one exhausted ammunition type, a full bag, or entering after a long mining route.
Separate the approach from the attempt
Do not spend the boss loadout on ordinary enemies or optional mining before the arena.
- Clear only the path required for safe access.
- Keep the strongest food and ammunition untouched.
- Use a nearby camp to reset sleep, cooking, and crafting needs.
Build a two-layer food plan
Stamina keeps attacks and movement available; health food prevents one mistake from ending the run.
- Carry cheap recovery for the route.
- Reserve stronger healing for the fight.
- Activate a relevant buff only immediately before combat.
Protect ammunition economy
Fully charged shots and correct ammunition are more efficient than panic firing.
- Bring at least two supported ammunition types.
- Craft a reserve beyond the expected attempt.
- Use Workpedia upgrades for the damage, charge, recovery, or healing problem actually observed.
Review the failure, not just the result
After an attempt, identify the first resource that ran out or the mechanic that caused repeated damage.
- Upgrade only the failed layer.
- Practice positioning before spending rare ammunition.
- Return to mining if equipment is clearly below the recipe tier.
Run a reconnaissance attempt before spending rare supplies
Use the first serious encounter to learn the arena rather than to force a victory. Enter with replaceable ammunition and enough recovery to observe attack tells, safe angles, obstacles, and the route back out. The objective is to answer concrete questions: which attacks punish standing still, which movements break line of sight, and when a charged shot is safe. Do not consume a rare buff merely to compensate for missing knowledge. After the attempt, write down the two patterns that caused the most damage and practice reacting to those first. This converts an expensive unknown fight into a repeatable sequence. Once positioning is reliable with ordinary supplies, bring the stronger ammunition and food for a committed attempt instead of learning basic timing with progression-critical materials.
- Limit the scouting loadout to supplies you can replace easily, while still carrying enough healing to observe several attack cycles rather than dying to the first mistake.
- Test one variable per attempt—distance, cover, charge timing, or movement direction—so the result teaches a usable rule instead of producing a vague impression.
- End reconnaissance as soon as the arena questions are answered; survival with useful notes is more valuable than gambling the reserve on an unplanned finish.
Rehearse the loadout outside the arena
A theoretically stronger weapon can still be the wrong choice if its charge rhythm, range, or ammunition switching is unfamiliar. Practice the exact hotbar order and recovery sequence against ordinary enemies before entering the boss area. Confirm that food can be selected without searching, that the backup ammunition works with the chosen weapon, and that an emergency item is not hidden behind mining tools. Use the same movement habits planned for the fight, including firing only after reaching a stable angle. This rehearsal exposes control problems without consuming the boss attempt. It also separates player execution from equipment strength: if the sequence feels unreliable in a safe encounter, another damage upgrade will not fix the underlying input or inventory problem.
- Arrange weapon, ammunition, health recovery, stamina recovery, and escape utility in a fixed order, then repeat the sequence until selection requires no menu hesitation every time.
- Practice switching to the backup ammunition before the primary stack empties, because discovering an incompatible or misplaced reserve during the fight defeats its purpose under pressure.
- Use ordinary enemies to verify charge timing and firing distance, but stop before the rehearsal consumes the protected food and ammunition assigned to the boss.
Create a phase-neutral recovery rule
Do not wait for a dramatic low-health moment to decide whether to heal. Choose a conservative trigger based on how much damage the boss can deal during one failed dodge, then recover while a known safe opening is available. The exact threshold depends on your current gear and observations, so derive it from reconnaissance instead of copying a universal number. Apply the same rule throughout the fight unless a later pattern clearly changes the risk. Likewise, decide when to restore stamina and when to stop firing so movement remains available. A fixed recovery rule reduces panic, prevents simultaneous health and stamina failure, and makes post-fight analysis clearer. If the rule cannot be followed because openings are too short, the problem is positioning or item access, not merely supply quantity.
- Base the healing trigger on observed burst damage plus a safety margin, rather than the size of the health bar alone or an unverified community threshold.
- Recover during a repeatable safe opening and move first if necessary; opening the inventory in a dangerous position turns a correct item choice into avoidable damage.
- Reserve enough stamina for one defensive sequence after every attack cycle, even when spending more would allow an additional shot or faster repositioning during every cycle.
Diagnose defeat with an evidence table
After a failed attempt, classify the earliest decisive error under knowledge, execution, equipment, or logistics. Knowledge means an attack or arena feature was not understood. Execution means the correct response was known but missed. Equipment means reliable hits still produced inadequate progress or survivability. Logistics means food, ammunition, hotbar access, or approach planning failed. Record only the first decisive failure, because later shortages may be consequences rather than causes. Then change one layer for the next attempt. Buying every available upgrade wastes resources and hides whether the adjustment worked. A short evidence table makes each loss productive and protects rare materials. When several attempts show the same execution error, schedule practice; when clean execution still fails, upgrade the specific equipment layer supported by the evidence.
- Write the first mistake that changed the fight, the resource state immediately before it, and the response attempted; avoid summaries such as needed more damage.
- Change one major variable for the next run, whether positioning, hotbar order, ammunition, food, or gear, so the outcome can confirm or reject that diagnosis.
- Escalate to an upgrade only after repeatable execution still exposes the same limit; otherwise practice is cheaper and produces a clearer improvement signal before returning.
Frequently asked questions
Should I mine before fighting the boss?
Only if it does not consume the food, ammunition, health, time, or bag space reserved for the attempt.
What should I upgrade after a failed fight?
The first failed layer: damage, charge speed, ammunition supply, healing, movement, or survivability.